Sunday, August 15, 2010

Halloween Day 2: Witch's Hat

Well, it's Sunday and the weather forecasters have predicted that the heat and humidity will finally abate today. Yesterday wasn't nearly as bad as it was last week, but still not a good day to be outside. I walked from my Spanish class in Printers Row to my Michaels, at most a 10 minute walk, but I was fairly uncomfortable. Among other thing, I was looking for Halloween paper for my upcoming Halloween cards, but they had next to nothing! Not only do I want instant gratification, but I am worried about how long a "pre-order" would take to ship because I'm trying to have my Halloween cards done by the end of this month so I can move on to Christmas. That's why I haven't ordered any online at the moment. My next big online purchase will hopefully be a pink ATG tape gun, but those are all preorders or "not available" at the moment. I may check Joann's today, but we'll see.

On to the card. This is a super simple card, although I was happy to use one of my new embossing folders, some Halloween bling which I did pick up at Michaels, and some ribbon from last year's Thanksgiving/fall Target dollar bin ;)

Photobucket

Materials:

- Paper: A2 kraft card base; purple cardstock cut at 4 x 5.25", two 4" x 1-2" pieces of coordinating cardstock from my scraps. The green piece is DCWV textured.

-Embossing folder(s): Cuttlebug "Spots and Dots"

- Adhesives: Glue Arts Glue Glider Pro, Zig two-way glue pen, glue dots

- Cartridges: Paper Doll Dress Up (hat cut at 3.5")

- Embellishments: ribbon, gems


Photobucket

Saturday, August 14, 2010

Halloween Day 1: Frankenstein

Happy Saturday! I have been seriously behind in my Halloween cards. I am going to try to do nothing but for awhile until I get them done. I don't know whether I will be able to stick to it every single day as I'm working on a couple of other projects, but I will try. I made two Frankenstein cards both on A2 card bases. I made the larger one first, then scaled it down. The instructions below are for the smaller guy.

Photobucket

Materials:

- Paper: A2 card base; two pieces of cardstock, one for the lining and one for the background paper cut 4 x 5.25".

-Stamp(s): Peachy Keen Stamps "Basic Paper Doll Faces" (PK-573), stamped using Memento ink. Bats are from a holiday stamp set from last year--no idea on manfg.

- Adhesives: Glue Arts Glue Glider Pro, Zig two-way glue pen, foam tape.

- Cartridges: Paper Doll Dress Up (frankenstein and clothes at 3.5", bag at 4", tree at 3")


Here's the first one. I had to cut down the tree to make it fit, which is why I've provided directions for the smaller one.
Photobucket

Friday, August 13, 2010

The Greeting Farm: WS - Savannah

Happy Friday! This fun girl is another Greeting Farm stamp. I colored her with my Copics.


Photobucket


Materials:

- Paper: A2 white card base; pattern paper (DCWV "It's a Boy") cut 4 x 5.25", pattern paper mat cut about 3.5 x 4" (We R Memory Keepers?); strip of pink card stock 5.5 x about 1.5" before punching; and 2 x 4.25" pink card stock.

-Stamp(s): Greeting Farm: WS Savannah stamped using Archivers ink, embossed with clear embossing powder and colored with Copics; Dreamer's Designs "Birthday 2" stamped with Memento ink.

- Adhesives: Glue Arts Glue Glider Pro

- Punches: MS Doily Lace, Corner Chomper

- Embellishment(s):ribbon, Sakura gel pen.

Thursday, August 12, 2010

Simple Thank You Card

Morning. More than half-way through the week! If only this heat and humidity would break. For today's post, I needed a simple card to include with a package I'm mailing today. It is 4" square and uses DCWV Nana's Kitchen paper, which I love. The ribbon is from Michaels and the bling from Target of all places. I used a 1.75" scallop punch, a smaller circle punch, and a pair of edging scissors for the trim. The stamp is from the Kaban Little Friends set I showed you yesterday.

Here's my card:

Photobucket

Wednesday, August 11, 2010

New Kanban stamps!

This stamp set is my first order from a shop across the pond. I saw stamps from this stamp set by Kanban called Little Friends on a blog and had to find them for myself. The rest of the set includes two more bears, as well as various sentiments. Even with the poor exchange rate with the Euro, I got a pretty good deal, including shipping from Funky Kits.

Photobucket

Materials:

- A2 black card base; white lining cut 4 x 5.25", small strip of yellow card stock approximately 4 x 1.5," orange mat cut at about 3.5 x 4", small strip of pink card stock 4.25" x about .75" before punching, and a small strip of patterned blue cut at 4.25 x .5"

-Stamp(s): Kanban Stamps "Little Friends" stamped using Archivers ink and embossed with clear embossing powder; Stampendous "Notes for a Friend," stamped using Memento ink

- Adhesives: Glue Arts Glue Glider Pro

- Punches: MS Doily Lace

- Embellishment(s)::ribbon, gems

Tuesday, August 10, 2010

No card today but new project

But head over to TheFishie's Kitchen and see the blueberry muffins that I made for breakfast. I'm also working on a Wall Mini Album for a friend's son for Christmas. Here's the one I made for his sister a week for so ago. He loves cars, so when I saw the Happy Wheels paper stack by Atd in the clearance section of Michaels, I knew it would be perfect. As you can see, I've cut out some of the little cars and other things from the pattern paper, but will also add some bigger ones using my Cricut.

Photobucket

I hope to have this finished by the end of the week!

Monday, August 9, 2010

Friend Beaver

It's Monday! Time for another week and another critter from the Create a Critter cartridge. I had fun making the ripply ribbon using glue dots, although I'm not entirely sure the top was the best location for it. Oh well. His cuteness will compensate.

Photobucket

Photobucket

Photobucket
Materials:

- A2 white card stock card base; pattern paper cut 4 x 5.25", small strip of green card stock approximately 5.25 x .75" before trimmed with edging scissors

-Stamp(s): Hero Arts "Friends" stamped using Colorbox chalk ink

- Cartridge(s): Create a Critter (beaver and log cut at 2")

- Adhesives: Glue Arts Glue Glider Pro, foam tape, glue dots, Zig Glue pen

- Punches: Marvy Uchida quote bubble, distressed with Colorbox chalk ink, Provocraft edge scissors

- Embellishment(s)::Ribbon

Sunday, August 8, 2010

Super Tweet

Yesterday, I did lots of organizing. I sorted all my paper scraps so now there's a file for card stock and a file for pattern paper, each divided by color. I also built a new rack so I was able to move stuff off my window ledge. I also printed and colored a blank Copic chart so I can keep track of all the colors I've bought. I now have 30! On to the card. This one is similar to the one I made on Friday. I had been meaning to use this little birdie from the Create a Critter cartridge and the My Pink Stamper stamp went perfectly, along with a little help from a holiday Peachy Keen Stamp set.

Photobucket

Materials:

- A2 kraft cardstock card base; two 1.5" strips of color cardstock (before punching)

-Stamp(s): Peachy Keen Stamps "Gingerbread Doll Set and My Pink Stamper "Punny-licious" stamped using Colorbox chalk ink

- Cartridge(s): Create a Critter (bird cut at 2")

- Adhesives: Glue Arts Glue Glider Pro, Mod-Podge, foam tape

- Punches: Martha Stewart Scallop Dot Edge Punch

- Embellishment(s):Ribbon, heart brad

Saturday, August 7, 2010

Embossing Folder Storage

I didn't make a card or finish a project last night, but I did make these cute little folders for my embossing folders. As you know, in the last couple weeks, I have accumulated a bunch of new embossing folders (and scrapbooking supplies, in general, but let's not talk about that). Anyway, I have gotten so many new tools that I haven't had a chance to try them all yet. I saw this idea on Youtube and on The Paper Boutique last night and decided to try it. I made the folders using the From My Kitchen Cricut cartridge and embossed them with each folder. Now when I go looking for an embossing folder, not only will they be neatly displayed, but the storage solution is my sample of what the embossed image looks like. I love papercrafting as even the storage is fun!

Photobucket

Photobucket

Photobucket

Friday, August 6, 2010

Thank You Butterfly

Happy Friday! I scraplifted the idea for this card from a YouTube video posted the other day by CropStop.com. I'm beginning to get into using kraft paper, which has been in style for awhile (that's the brown-colored cardstock that's the color of butcher paper). She did a really cool trick for the bow which I think I will use quite often. She punched a hole in the center of where her bow would be located, then fed the ribbon through the hole after going around the card. The result is a better-looking bow that will not wiggle. Thanks for the inspiration!

Photobucket

Materials:

- A2 kraft cardstock card base; two 1.5" strips of color cardstock (before punching)

-Stamp(s): Inkadinkado Dawn Houser's Thank You stamped using Colorbox chalk ink

- Cartridge(s): Create a Critter

- Adhesives: Glue Arts Glue Glider Pro, Mod-Podge

- Punches: Martha Stewart Scallop Dot Edge Punch

- Embellishment(s)::Ribbon (Target)


Photobucket

Thursday, August 5, 2010

Paper Cutz Challenge # 52

I'm participating in my first challenge at Paper Cutz Challenge (Mary's blog). The challenge was to make a card using only red, white, blue, black and yellow. (I promise the dotted paper is red, not pink!) The heart is from Inkadinkado Dawn Houser's Thank You that has a number of beautiful images, including a vintage ball gown that I hope to use soon.

Photobucket

Materials:

- A2 white card base, scraps from GCD Studios and DCWV

- Stamp(s): Inkadinkado Dawn Houser's Thank You (heart); an old Hero Arts (?)(sentiment) stamped using Colorbox chalk ink

- Adhesives: Glue Arts Glue Glider Pro, foam tape, glue dots

- Punches: Martha Stewart Doily Lace, corner chomper

- Embellishment(s)::Ribbon (Target)

Photobucket


Photobucket

The Greeting Farm: Hippie Anya

The mat and pattern paper are from GCD Studios and are part of what I brought home from CHA and even though these are the colors of my rival high school, I really like it. I didn't want to overwhelm the stamped image, thus after playing around with the layout for what seemed like ages, I went for this incredible simple design.

Photobucket


Materials:

- A2 white card base, 4 x 5.25 mat, 1.5 x 4.5" strip of pattern paper, 4 x .75" strip of cardstock

- Stamp(s): The Greeting Farm "Hippie Anya" stamped with Ranger Archival ink and embossed using clear embossing power; Hero Arts "Friends" and Inkadinkadoo "Expressions" stamped with Colorbox chalk ink and embossed with clear embossing powder.

- Adhesives: Glue Arts Glue Glider Pro, foam tape

- heart embellishment from my stash


Photobucket
Here's the inside.

Wednesday, August 4, 2010

Exploding Envelope Box

This project was adapted from a Ustream class by Laura Denison (Following the Paper Trail) entitled "Exploding Envelopes." Essentially it is a mini album that folds up into a box. I haven't put in the pictures yet, but there are probably at least 40 places for pictures or journaling.

The box is made with No. 10 envelopes, some pattern paper, and a lots and lots of cardstock. During the first class, Laura used gorgeous envelopes from a stationary store, but all I had was ordinary office ones so I improvised and made my own evenlopes out of cardstock where needed. I also had to play around with the measurements because my envelopes, though No. 10, were slightly different by about 1/16-1/8". I'm a little sleepy now, but may update this post later with the measurements that I used for the envelopes, pockets, and tags I made. The recording of her class is available here. She has also promised to write up the instructions, which will likely be available on her Etsy.

Photobucket

Photobucket

Photobucket


Photobucket

Photobucket

Materials:

5 - 12x12" sheets of pattern paper
12+ sheets of 8.5x11" coordinating cardstock
8 - No. 10 envelopes
Glue Glider Pro, liquid glue, Mod-Podge, glue dots
Prima and other flowers, gems, ribbon, brads

Tuesday, August 3, 2010

The Greeting Farm: Fleur Anya

As I posted a couple days ago, I got a bunch of new Copic markers at CHA. Here's another version of the Fleur Anya stamp colored using some of my new markers. I'm still working on my coloring,and wasn't able to take the Copic class at CHA, but hopefully practice will make perfect.

Photobucket

Materials:

- A2 yellow card base, 4 x 5.25 pattern paper (I used DCWC Summer Dream), green strip of cardstock 5.25" x 2"

- Stamp(s): The Greeting Farm "Fleur Anya" stamped with Ranger Archival ink and embossed using clear embossing power; Hero Arts "Friends," stamped with Colorbox chalk ink.

- Punch(es): 2" Scallop

- Adhesives: Glue Arts Glue Glider Pro, foam tape

- Ribbon from Michaels

Monday, August 2, 2010

Watch Me Grow: Wall Mini Album for Kaylie

(WARNING: There are a ton of photos in this post, so you may want to stop it from loading after you see the first few pictures appear.)

This is my version of the Watch Me Grow Wall Mini Album for Kaci's little girl. My hope is to do one for her son too and give them both as Christmas presents. This wall hanging was designed by Laura Denison of Following the Paper Trail and is available for purchase on her Etsy page. As you can see, it is held together by a 60" measuring tape, so if it's mounted on the wall, it can be used as a height chart. All the pockets have tags like the ones shown in the first picture for journaling and photos. I still have to purchase some hooks so the thing can be hung on the wall, but basically it is complete. It is a super thick book with 9 hanging panels with pockets, 8-4 x 4" photo mats on the outside of the pockets and 26 tags of various sizes in the pockets for pictures and journaling like the ones shown in the first picture. I used mostly paper from K&Co's Citronella paper stack, cardstock and ribbon from Michaels. The flowers are cut using just about every flower in my Cricut cartridge collection and are all Mod-Podged, of course, with brads and glitter glue (Stickles)for centers.

Photobucket

Photobucket

Photobucket

Photobucket

Photobucket

Photobucket

Photobucket

Here's close-ups of most of the individual pages:

Photobucket

Photobucket

Photobucket

Photobucket

Photobucket

Photobucket

Photobucket

Sunday, August 1, 2010

CHA Supershow Loot

As I mentioned earlier, I put away all my CHA goodies last night. I think this is most of it, not counting various free things that I got.

Photobucket
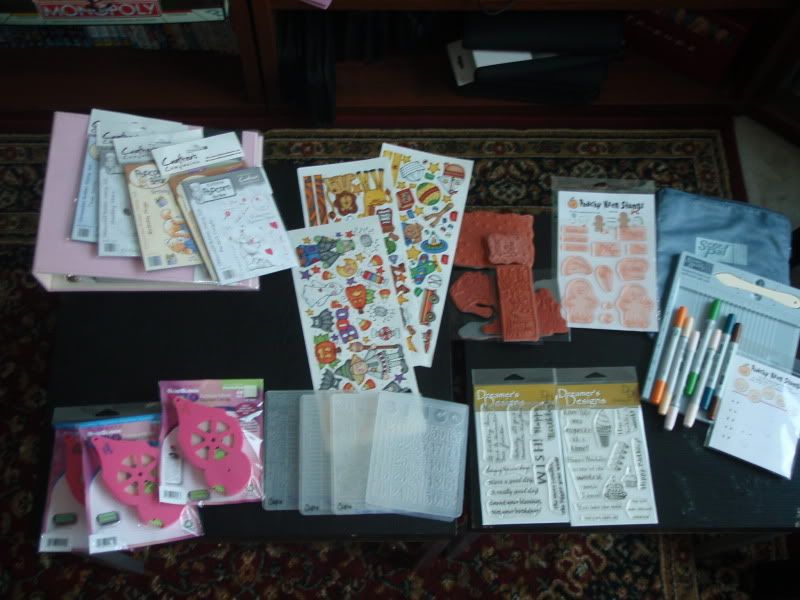
The red rubber stamps and stickers were a screaming deal ($2 and $1, respectively), so I couldn't resist. I've never heard of the vendor, but they had a ton.

Photobucket
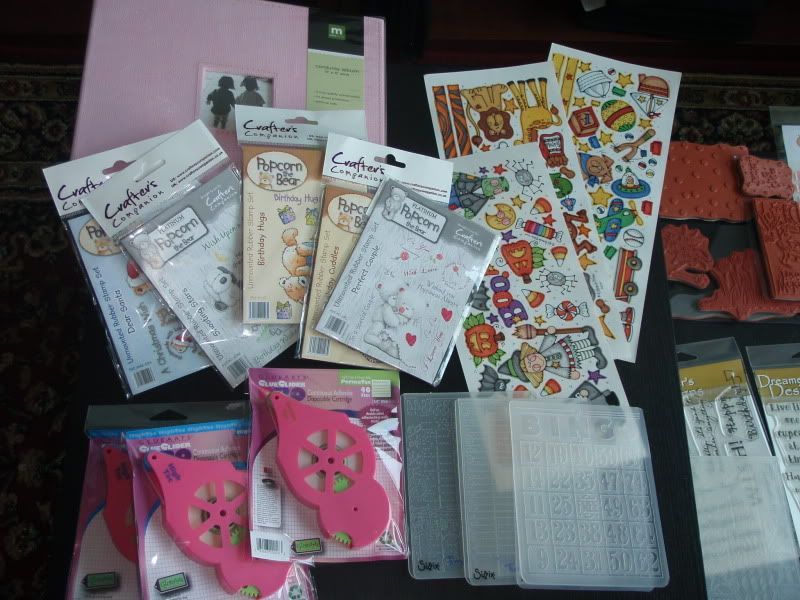
In addition to new goodies, I got a good deal on some basic supplies including a nice album covered in pink corduroy for $6 and some refills for my Glue Glider Pro at a little over $5 each.

Photobucket

Here are some closeups of new (to me) products that I got:

Photobucket
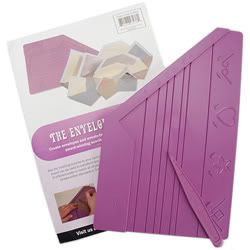
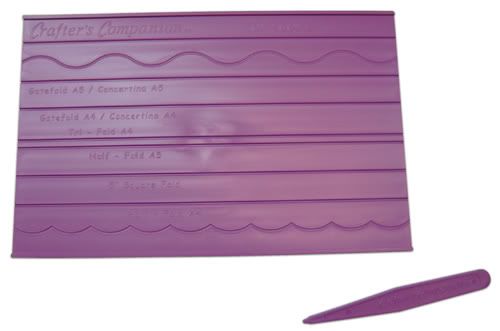
Although I complained that I did not like the Crafter's Companion product used in the workshop, I really love these bear stamps. He's called "Popcorn Bear," which is too adorable. Unfortunately, I can't use him until I get special mounting foam that will allow me to use these stamps with my acrylic blocks.

Photobucket
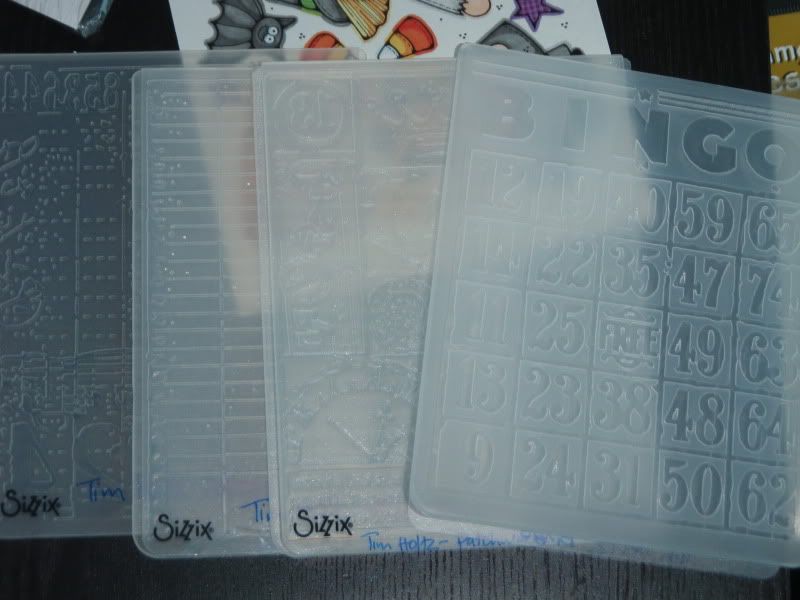
These are Tim Holtz Alternations embossing plates: Bingo, Collage, Notebook and Patchwork are their names. They were sold two to a set, but I no longer remember which came together.

Photobucket
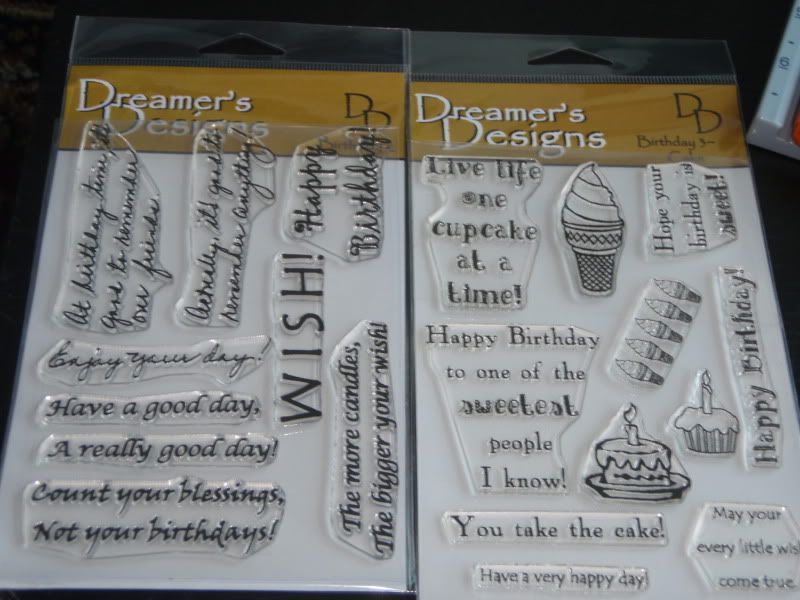
I thought I was done until I stumbled by this vendor. Not too long ago I was really light on greetings. Now I have more than I know what to do with!

Photobucket
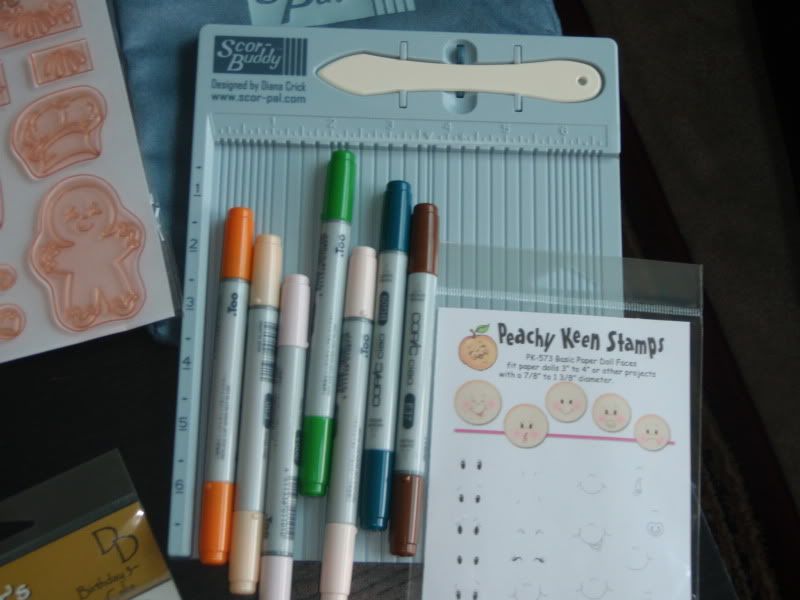
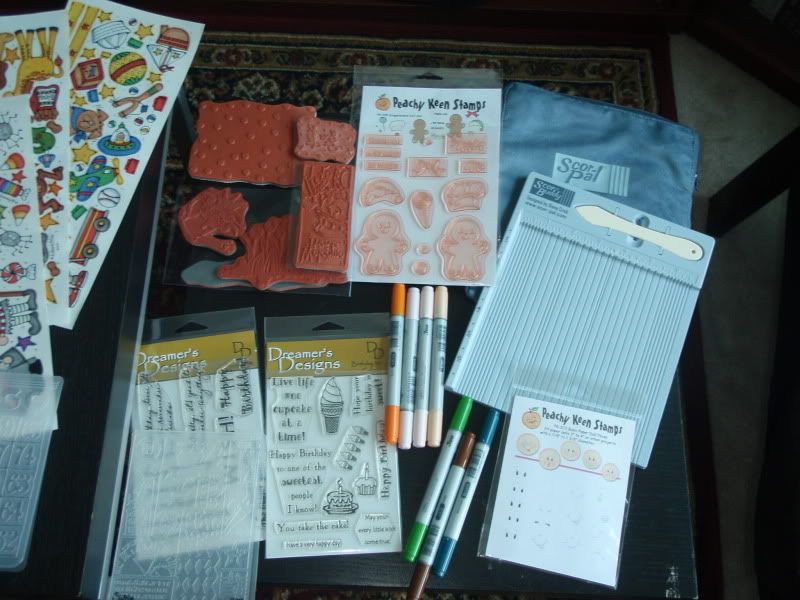
I have been thinking about a Score-Pal or a Martha Steward Scoring Board for quite some time (well, since the end of April), but eventually decided that I did not have the space to store something that was at least 13" square. Scoring boards are used for folding clean lines. Anyway, the Score-Buddy was the perfect compromise as it's about 6-7" square. I got a great deal at SuperMart on the Copic markers, so I got 7. (I haven't started a color chart yet, but need to do so to avoid duplicates.) Finally, I bought two more Peachy Keen Stamp sets--one is faces for Everyday Paper Dolls (coming in the mail this week) and some adorable holiday gingerbread men because I really will begin making Christmas cards soon.

(I'm not sharing how much I paid for all of this, but at least I had a fun time.)

Cards from CHA

Hi there,

Sorry for the late post, but I lost my internet connection Saturday morning, and didn't get it back for more than 24 hours. Here are a couple of cards I made at CHA. Altogether, I made about 7 cards plus a mini purse and a box. I attended a make and take sponsored by Jo-Ann's, Robin's (My Pink Stamper) Cricut workshop, and a workshop sponsored by Crafter's Companion, which is a device that I definitely DO NOT want.

Of the things I made, I really liked 3 cards and am still working on the other 5 (that were made in the Crafters' Companion workshop) to see if I can salvage them into something I'd be pleased to send. The Crafter's Companion workshop used great paper by GCD Studios, but I really did not like the other products used, especially the Crafter's Companion embossing plates shown here and here. Here are two of the cards I like. The third is already in an envelope to mail to my auntie, so maybe she'll post a picture when she receives it.

Photobucket
This card was made at a Jo-Ann's make and take.

Photobucket
This card was made at the Crafter's Companion workshop.

All and all I had a blast at CHA and would definitely go again. I put away all my loot last night, but might assemble it all to take a picture later as I got some really neat stuff.